
Stormwater Pit Installation: Is It Right for You?

Written by Richie Foster
Founder, licensed plumber
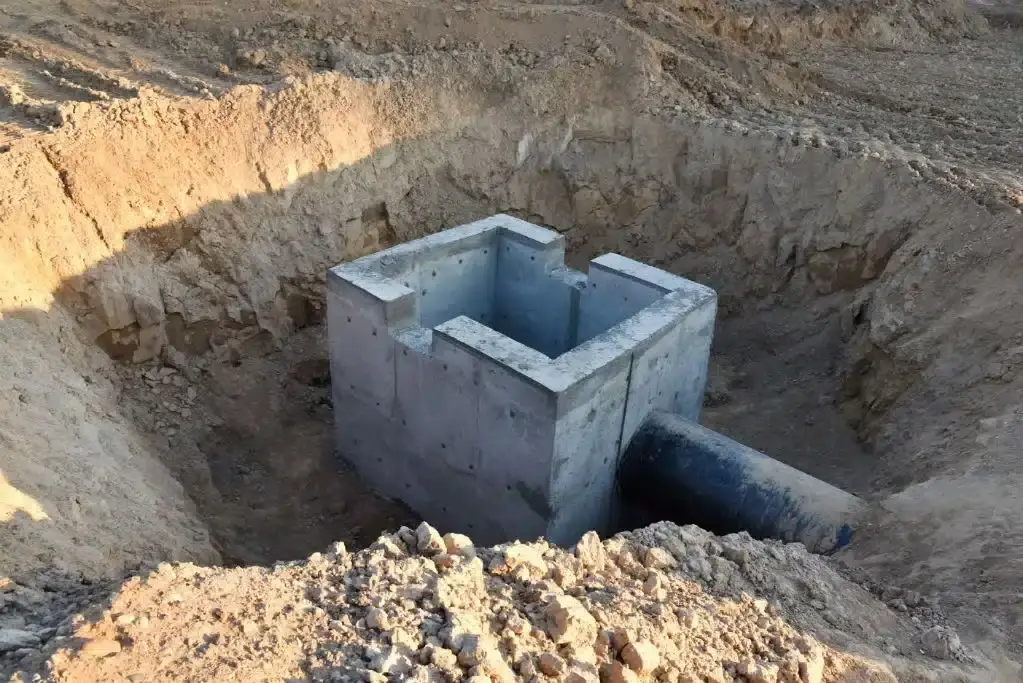
Australia might be famous for being dry, but when it rains here it can really come down. Managing that runoff is important for protecting your place from water damage, erosion and flooding. If the yard turns into a bog every time it pours, or water's pooling near the house, a stormwater pit might be the answer.
What is a stormwater pit?
It's a simple structure, usually installed underground, that collects and manages rainwater runoff. It works like a mini reservoir, gathering water from around the driveway, roof and yard and directing it into the stormwater drainage system.
How does it work?
The pit collects excess water and holds it temporarily before releasing it into the stormwater system or another outlet. A typical setup has a grated inlet to collect the water and a connection to underground pipes that carry it away from the property.
Is a stormwater pit right for you?
Before we get into how one's installed, weigh up the pros and cons.
The pros:
- Stops water pooling on your property in heavy rain.
- Reduces the risk of structural damage to the home, especially the foundation.
- Versatile, suiting everything from a backyard to a large driveway.
- Once it's in, it needs little maintenance to keep doing its job.
The cons:
- It can take significant digging and space, depending on the property.
- Installation can be complex, so it's tricky as a DIY if you don't know drainage.
- Without the odd clean-out, debris can clog it.
If water pools regularly and you've got the space, a pit is often the right fix. But it's worth ruling out the alternative first: sometimes the real problem is a blocked drain rather than an inadequate stormwater system. That's why it's worth having a drainage plumber inspect it before any work starts.
Pits versus other drainage options
A pit isn't the only solution. Here's how it compares:
Stormwater pits. Best for managing large volumes of water in one area, like a driveway or patio, usually connecting to the broader stormwater system.
Direct stormwater connection. Rainwater channelled straight from the roof, driveway or yard into council-maintained drains. Efficient in suburbs with established networks, though extra measures are sometimes needed.
French drains. Trenches filled with gravel and a perforated pipe, better suited to widespread water issues across a property.
Soakaways. Underground gravel-filled pits that let water seep into the soil. Not common here, and not well suited to dense, clay-rich Australian soils or heavy downpours.
How a plumber installs a stormwater pit
It can look straightforward, but professional installation keeps it compliant with council rules and makes sure the water actually flows the way it should. Here's how it's done.
1. Assess the site and drainage
We start by looking at the site, finding the poorly draining areas and working out the best spot for the pit. That means checking for existing drainage and council connections, reading the natural flow of rainwater across the property, locating underground utilities to avoid hitting them, and making sure it all complies with local drainage rules. We also size the pit to the expected water volume and runoff area.
2. Choose the right pit
Depending on the property, that's a plastic, concrete or polymer pit. The choice comes down to load (high-traffic areas may need reinforced concrete), water volume (heavy runoff may need a larger pit with multiple outlets) and soil (clay-heavy ground may need extra filtration).
3. Excavate and prepare the ground
We dig a hole large enough for the pit and the surrounding drainage material. It needs to be deep enough for proper flow into the system, with a slight slope to encourage drainage and room around the pit for gravel and bedding. A layer of compacted gravel then goes in the base for stability and filtration.
4. Install the pit and connect the pipes
With the pit in place, we connect PVC or concrete pipes for proper flow. That means cutting and securing the inlet and outlet pipes, sealing every connection against leaks, and checking the gradients so water runs consistently toward the outlet. Where it ties into an existing system or the council network, a licensed plumber makes sure it meets local regulations and gets any approvals needed.
5. Backfill and secure
To support the pit and stop it shifting over time, we backfill with gravel for drainage and support, geo-fabric to stop soil clogging the system, and compacted soil or concrete edging around the top to hold it steady.
6. Fit the grate and test
Last, we secure the grate to keep large debris out and test the system by running water through it, checking the flow and drainage and inspecting the connections for leaks or blockages.
How we do it at Fix-It Right
Installing or maintaining a stormwater pit doesn't have to be a headache when we handle it. We do residential pit installation, plus maintenance, repairs and drainage inspections. We keep it simple: there's $0 call-out, we give you three written quotes so you can pick what suits your budget, and you'll always know the price before we start. If the number's a stretch, Fix-It Now Pay Later gives you 12 months with no interest and no repayments. Every job is backed by our 10-year workmanship guarantee, because the whole idea is to fix it properly the first time. Plumbing fixed for good, not fixed for now.
We handle stormwater and blocked drains across Melbourne, Geelong, Ballarat and Canberra. Book online or give us a call.